
Table of Content
Divi, the most popular WordPress theme, with almost 1,000,000 downloads.
It includes the following features :
Looking for an easy way to install Google Analytics in WordPress?
In the following lines, you will see the importance of having Google Analytics installed on a site, learn how to install it with a plugin and also manually, then see the advantages and disadvantages of each of these two methods.
Why install Google Analytics on your website?
Having a website and not installing Google Analytics on it is like navigating with a pirogue on an ocean without a compass.
The competition on the internet is very tough nowadays, and Google Analytics is the tool that every website owner should use in order to gain a foothold in their industry and develop their website.
THE FOLLOWING AFTER THIS AD
Installing Google Analytics in WordPress offers advantages such as:
- Knowing the channels (social networks, sponsored links, search engines, etc.) through which visitors discover your site and from which countries they are
- Tracking visitors to your site: Google analytics allows you to know which pages and articles are visited on your website, which files are downloaded, the bounce rate and the time visitors spend on your site.
- The time visitors visit your site: this information allows you to know the best time to publish your next articles
- It allows e-commerce website owners to know their conversion rate and the turnover achieved.
This list is not exhaustive, the tool offers other very useful information that allows you to improve the content of your website, improve the user experience of your website. It also allows you to know and focus on the strategies that bring results.
Should I install Google Analytics with a plugin or not?
To install Google Analytics in WordPress, you have the choice between using a WordPress plugin or proceeding manually.
Well before we show you how to do both, let’s find out their advantages and disadvantages.
Advantages of installing Google Analytics using a plugin:
- Simple, easy, and fast installation
- They allow you to set up advanced Google Analytics tracking features with just a few clicks
- Some plugins propose on the management area of the website an interface relaying the information of Google Analytics about the website (Case of MonsterInsights)
Disadvantages of installing Google Analytics with a plugin :
It should be noted that the following disadvantages rarely occur
- Potential overloading of the website following the installation and activation of the plugin, which can lead to a slowness of the website
- Potential conflict of the plugin allowing to integrate Google Analytics on the site with other already active plugins.
Advantages of manually installing Google Analytics on WordPress:
- No need to extend the functionality of WordPress with a plugin over which you have no control
- No overloading of your website
Disadvantages of manually installing Google Analytics on WordPress:
- Risky and unreliable installation
- Google Analytics does not work on your site when you change your theme
- You miss the advanced and useful analytics that some plugins offer
Install Google Analytics with a plugin
There are many plugins that make it easy for you to install Google Analytics. In this article you will discover the MonsterInsights and Insert Headers & Footer plugins, then you will learn how to install Google Analytics using these two plugins.
But before you can install Google Analytics on a website, you need to sign up and have a Google Analytics account.
How to create a Google Analytics account?
You must have a Google Analytics account before you can install it on your website. Follow the steps below to create your account, the process is very simple.
First step:
Go to the official Google Analytics website, you will be redirected to the page whose capture is below where you have the choice between logging in with an existing account or creating a new one.
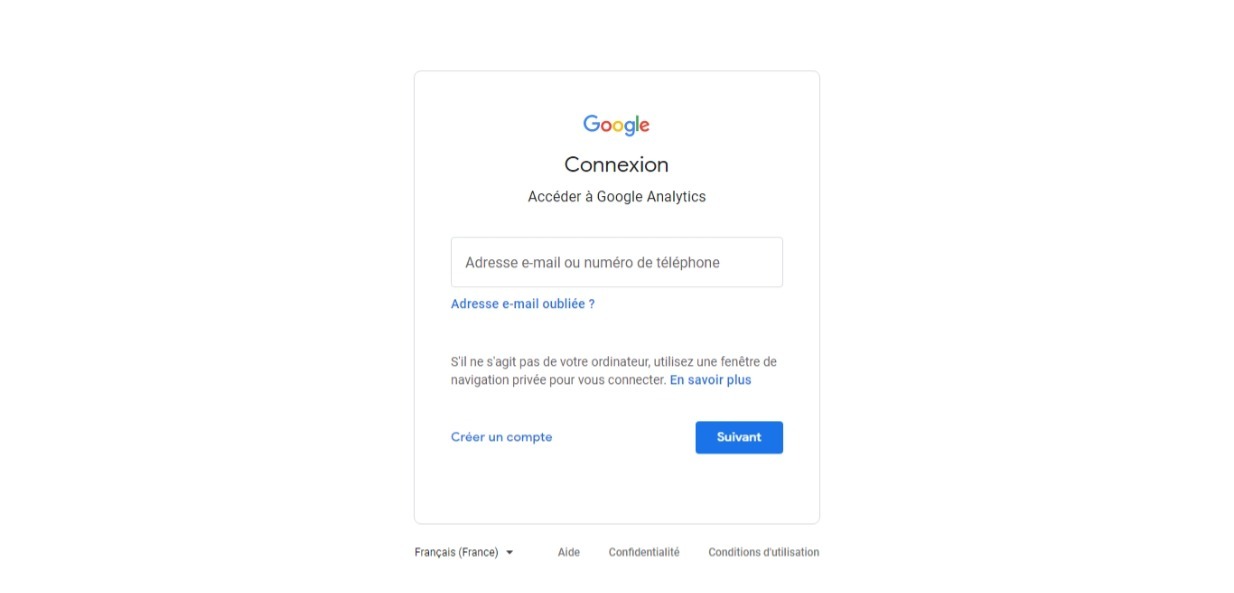
Enter your existing account information or create a new one and proceed to the next step.
Second Step:
Once you are logged in, you will be redirected to the page where to create your Google Analytics account.

Click on the button present on the page, you will see a form where you need to enter the name you want for your account, and also activate your Google Analytics data control settings.
Step Three:
After entering your account name and checking the boxes of your choice, you will proceed to the Google Analytics property setup step.

Enter the name of your website, choose your time zone and currency, then click on the “Next” button.
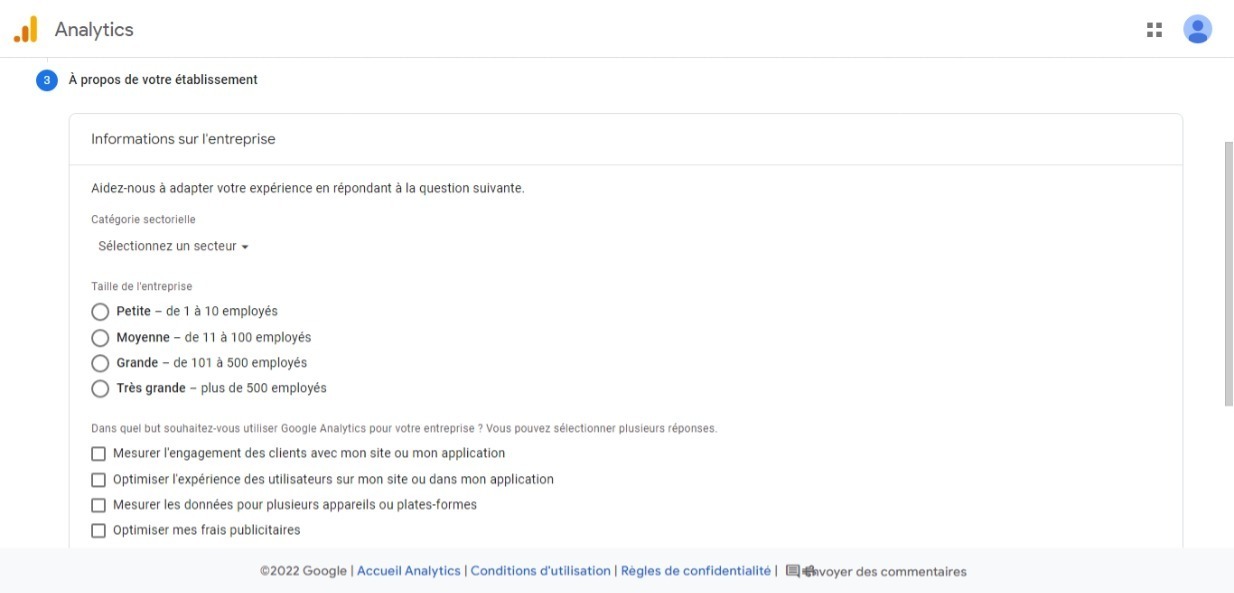
Then, you will be asked to select the information related to your company and also to choose the purpose for which you want to use Google Analytics.
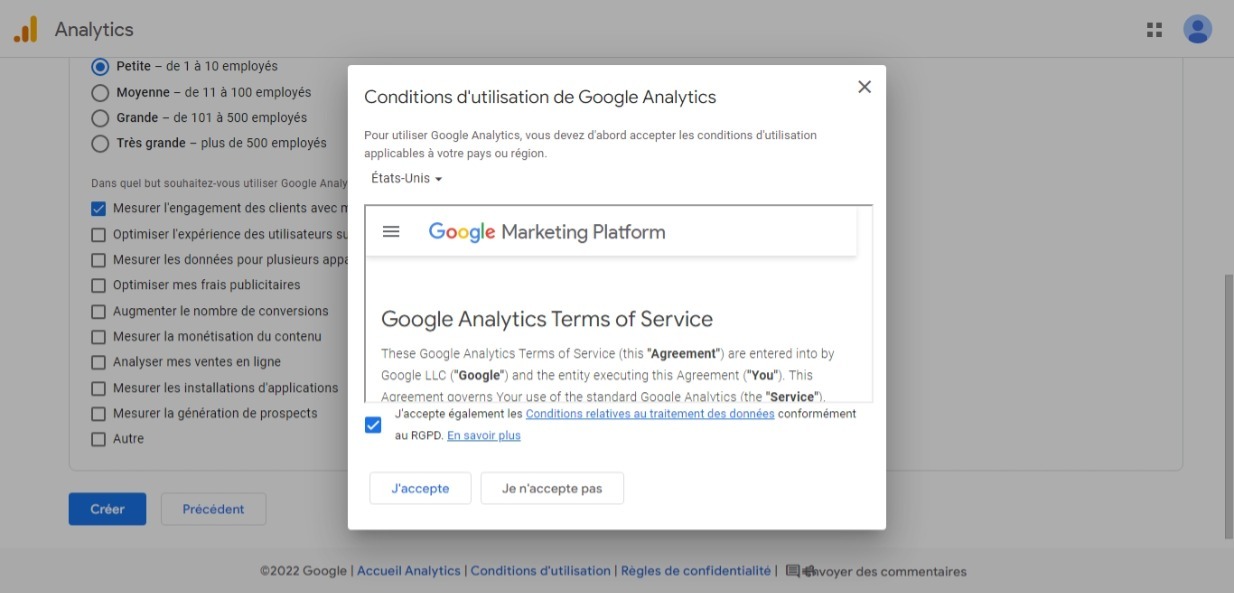
Once your choices are made, click on the “Create” button, a modal box will appear where you will have to accept the Google Analytics terms and conditions.
Then a new modal box will be displayed where you have to indicate the information you want to receive by email from Google Analytics.
Fourth and last step:
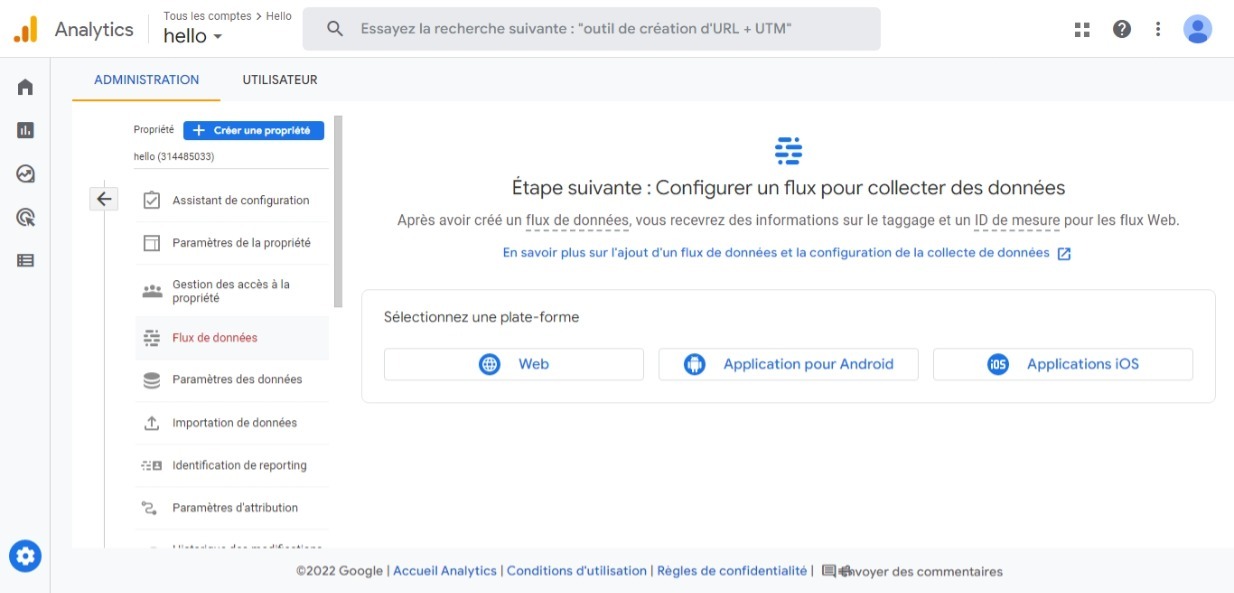
Once you have created your account, you will be given an administration interface where you can take advantage of Google Analytics features.
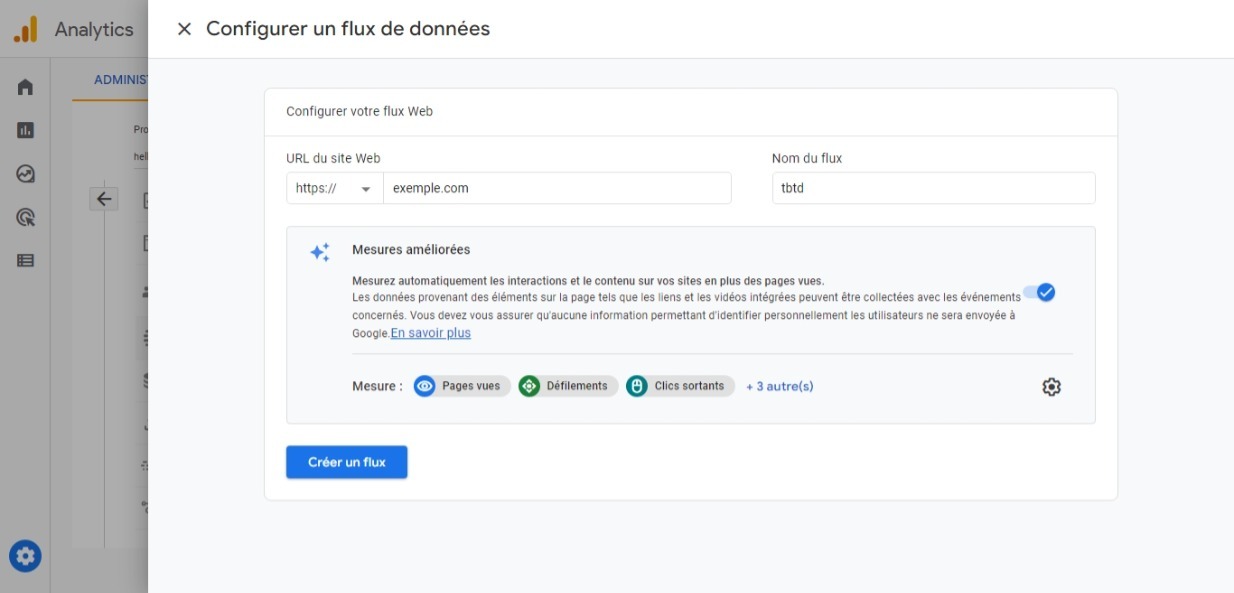
You will now enter the information of your website. In the first section of the shown page, choose Web.
After selecting Web, you will have to enter your website address and feed name.
You will notice an option checked by default just below, this option allows you to track in Google Analytics page views, scrolls, clicks, downloaded files and much more information.
Click on the button below after entering your information.
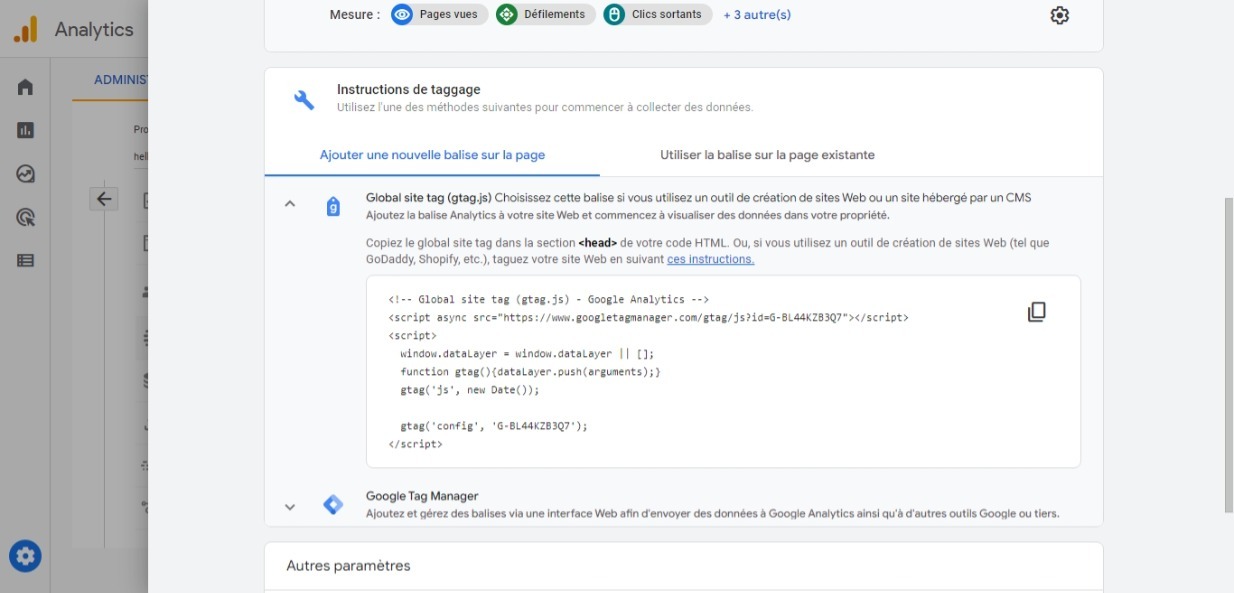
The information about your feed will be displayed. Just below the section showing your feed information, there is a section showed Tagging Instruction, click on Global site tag (gtag.js) and copy the code displayed. This is the Google Analytics tracking code.
Your Google Analytics account is created, now find out how to install Google Analytics in WordPress with the MonsterInsights and Insert Headers & Footers plugins.
THE FOLLOWING AFTER THIS AD
Install Google Analytics with the Insert Headers & Footers plugin
The process of installing Google Analytics using the Insert Headers & Footers plugin is very simple.
It is a regularly updated plugin, which is very reassuring. It is used by more than a million WordPress websites.
Before you can install Google Analytics with this plugin, you must first install and activate it from your WordPress admin interface.
Once the plugin is installed and active on your website, a submenu called Insert Headers and Footers will be in the Settings menu submenus of your admin interface, click on this submenu.
In the area that appears, paste the Google Analytics tracking code that you copied earlier.
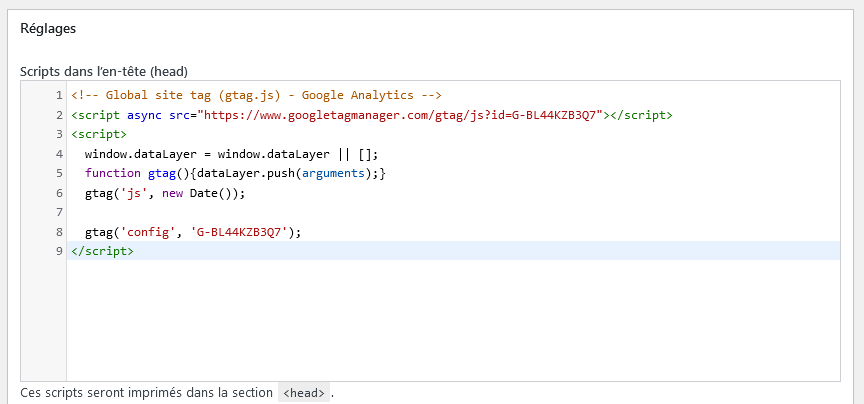
Then click on the “Save” button at the bottom of the page.
Now Google Analytics can track everything that happens on your website and relay it to you.
Install Google Analytics with MonsterInsights
MonsterInsights is the most popular and widely used Google Analytics installation plugin on WordPress. It is currently installed and active on over 3 million WordPress websites.
MonsterInsights offers a free and a premium version.
In this article, you will learn the installation of Google Analytics with the free version of the plugin.
Step 1: Installation and Activation of MonsterInsights plugin
Go to the management area of your WordPress website, install and activate the plugin from the add extensions area.
Once the plugin is installed and activated, a menu called MonsterInsights will be added to the menus in the vertical bar of the WordPress management area and you will be presented a welcome interface.

Step 2: Connect MonsterInsights to Google Analytics
Launch the Startup Wizard by clicking the “Launch the Wizard!” button.
Once the wizard is launched, MonsterInsights will take you through a process where the first step is to tell them which of the 3 options best describes your website.

Once you have made your choice, click on the blue button below to save your choice and continue the process.
In the next step, you will connect the plugin to Google Analytics by clicking on the connect button.

You will be redirected to the Google Account login page, where you will register by entering your account information.
Once you have registered, you will be asked if you want MonsterInsights to access your Google Account.
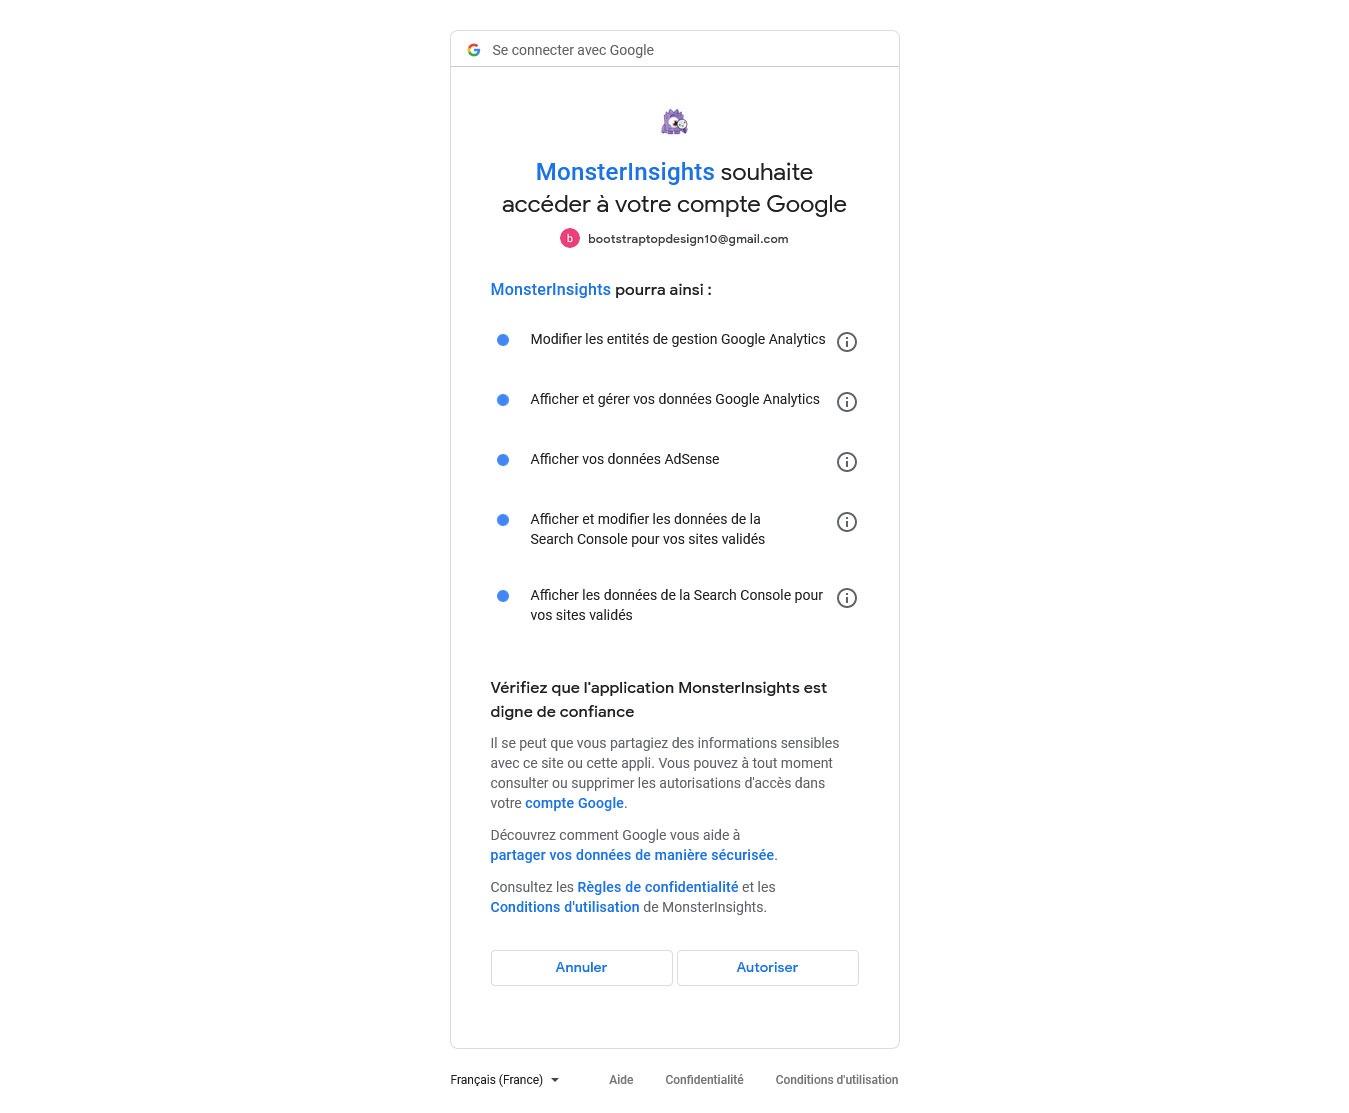
Click on the validation button. On the interface presented after your click, choose your website and click on the button that follows.
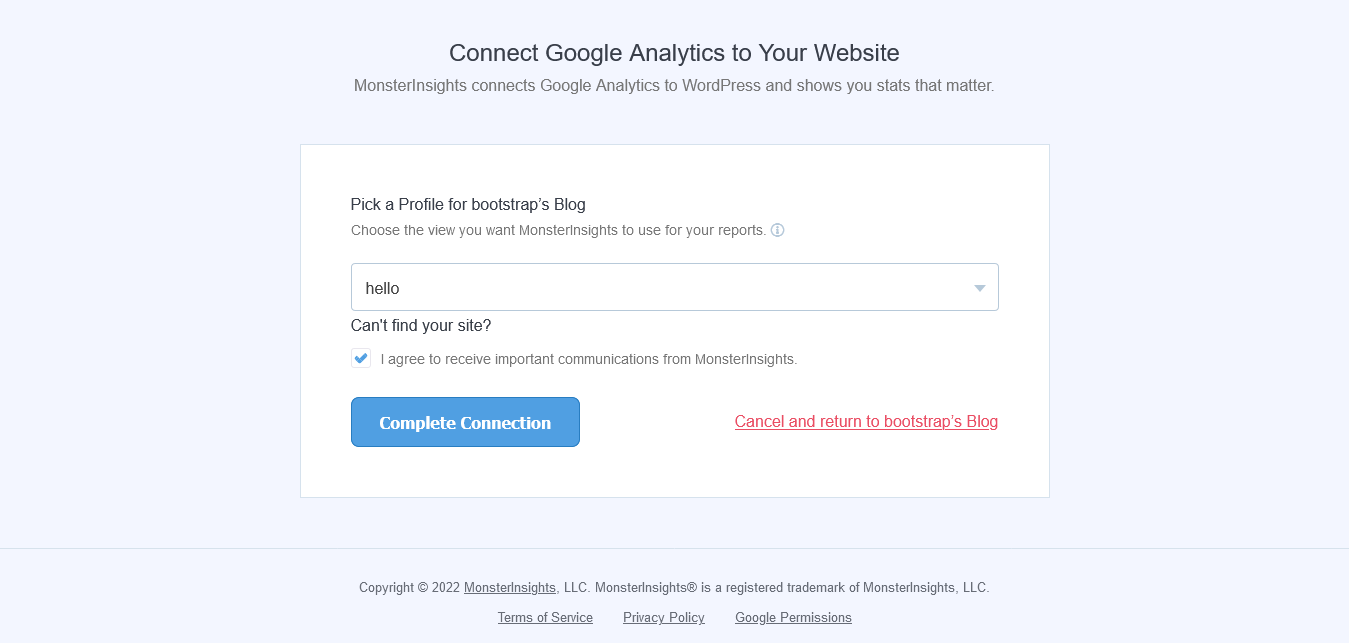
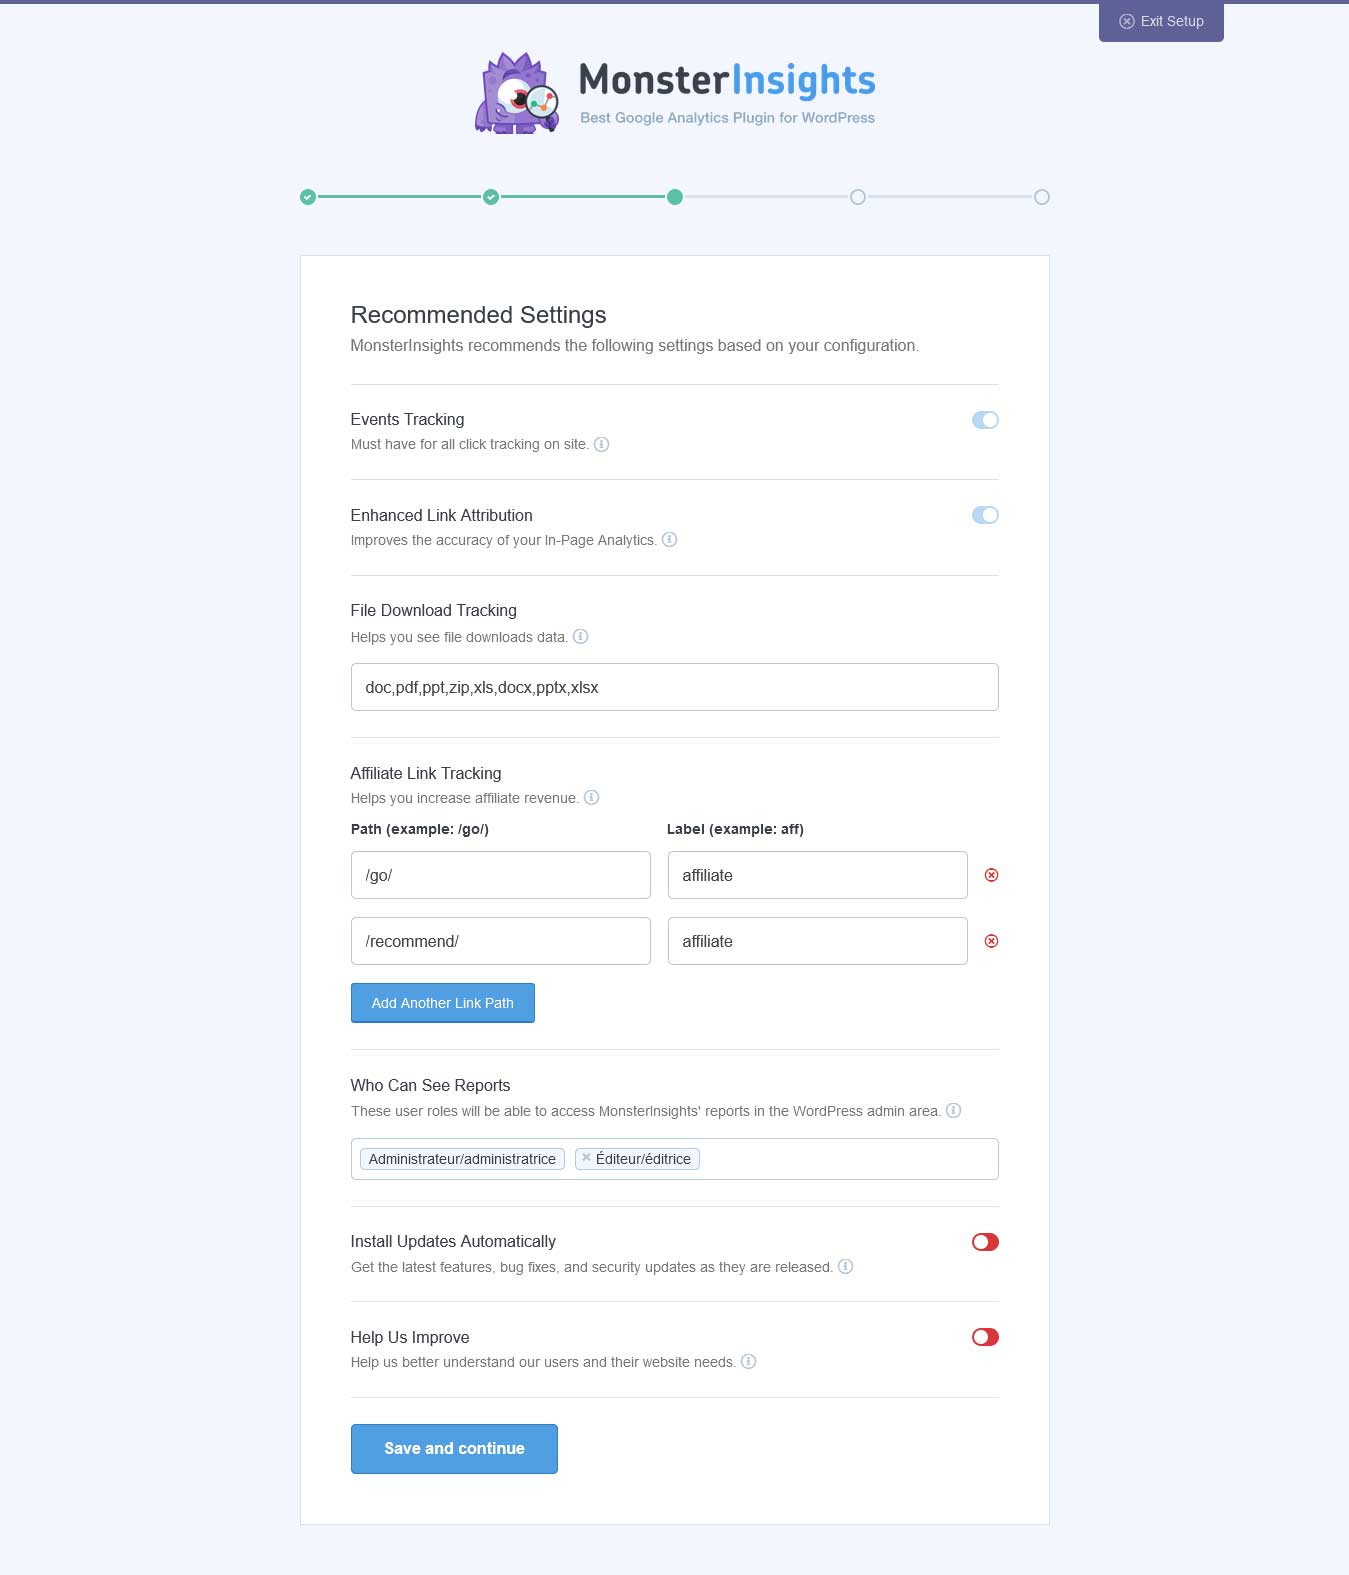
Now the link is done, the next step in the process requires configuring the plugin settings.
Keep the default configuration and click the “Save and Continue” button.
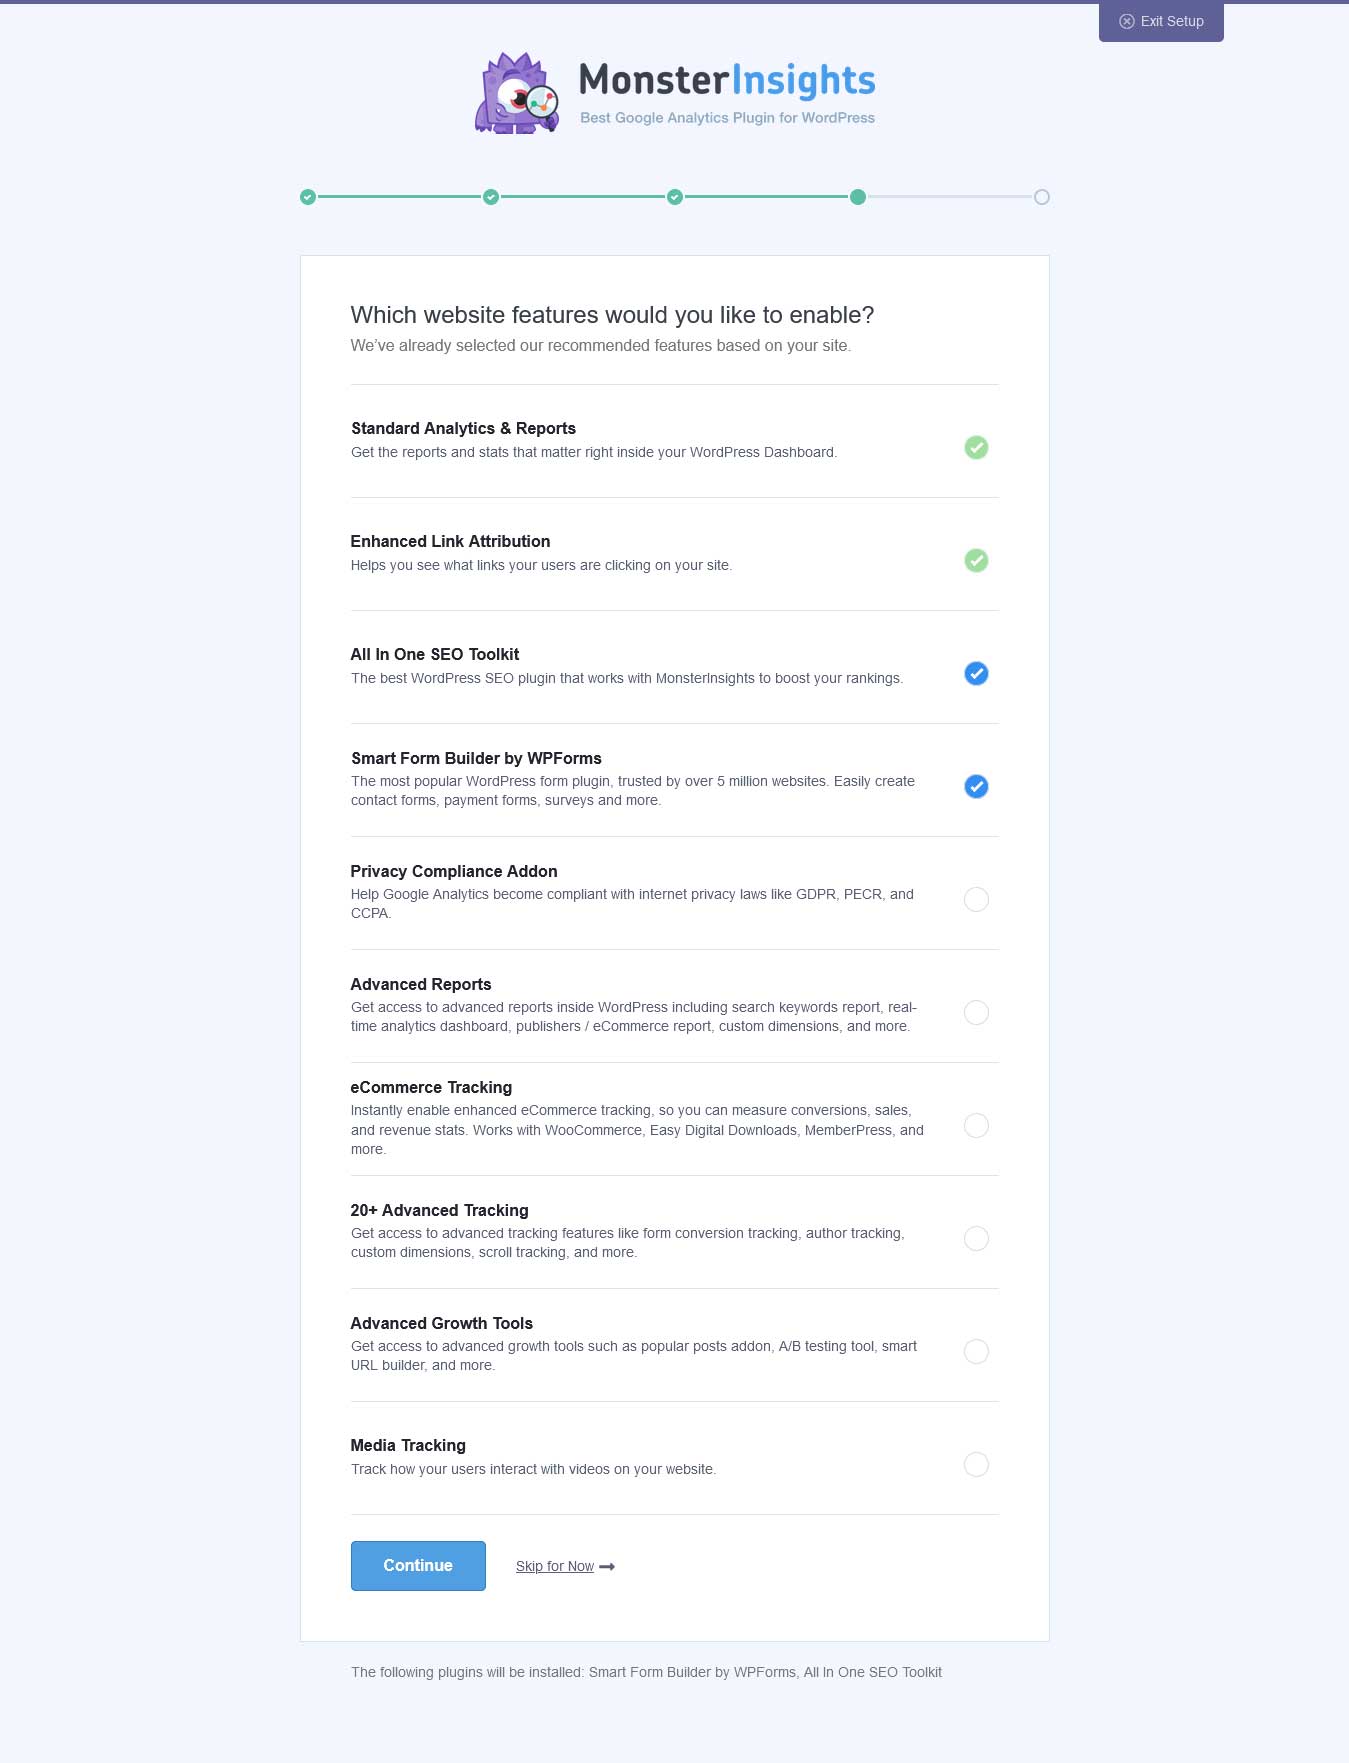
For the next step of the process, check the tracking features you want, and then click on the blue button below to continue.
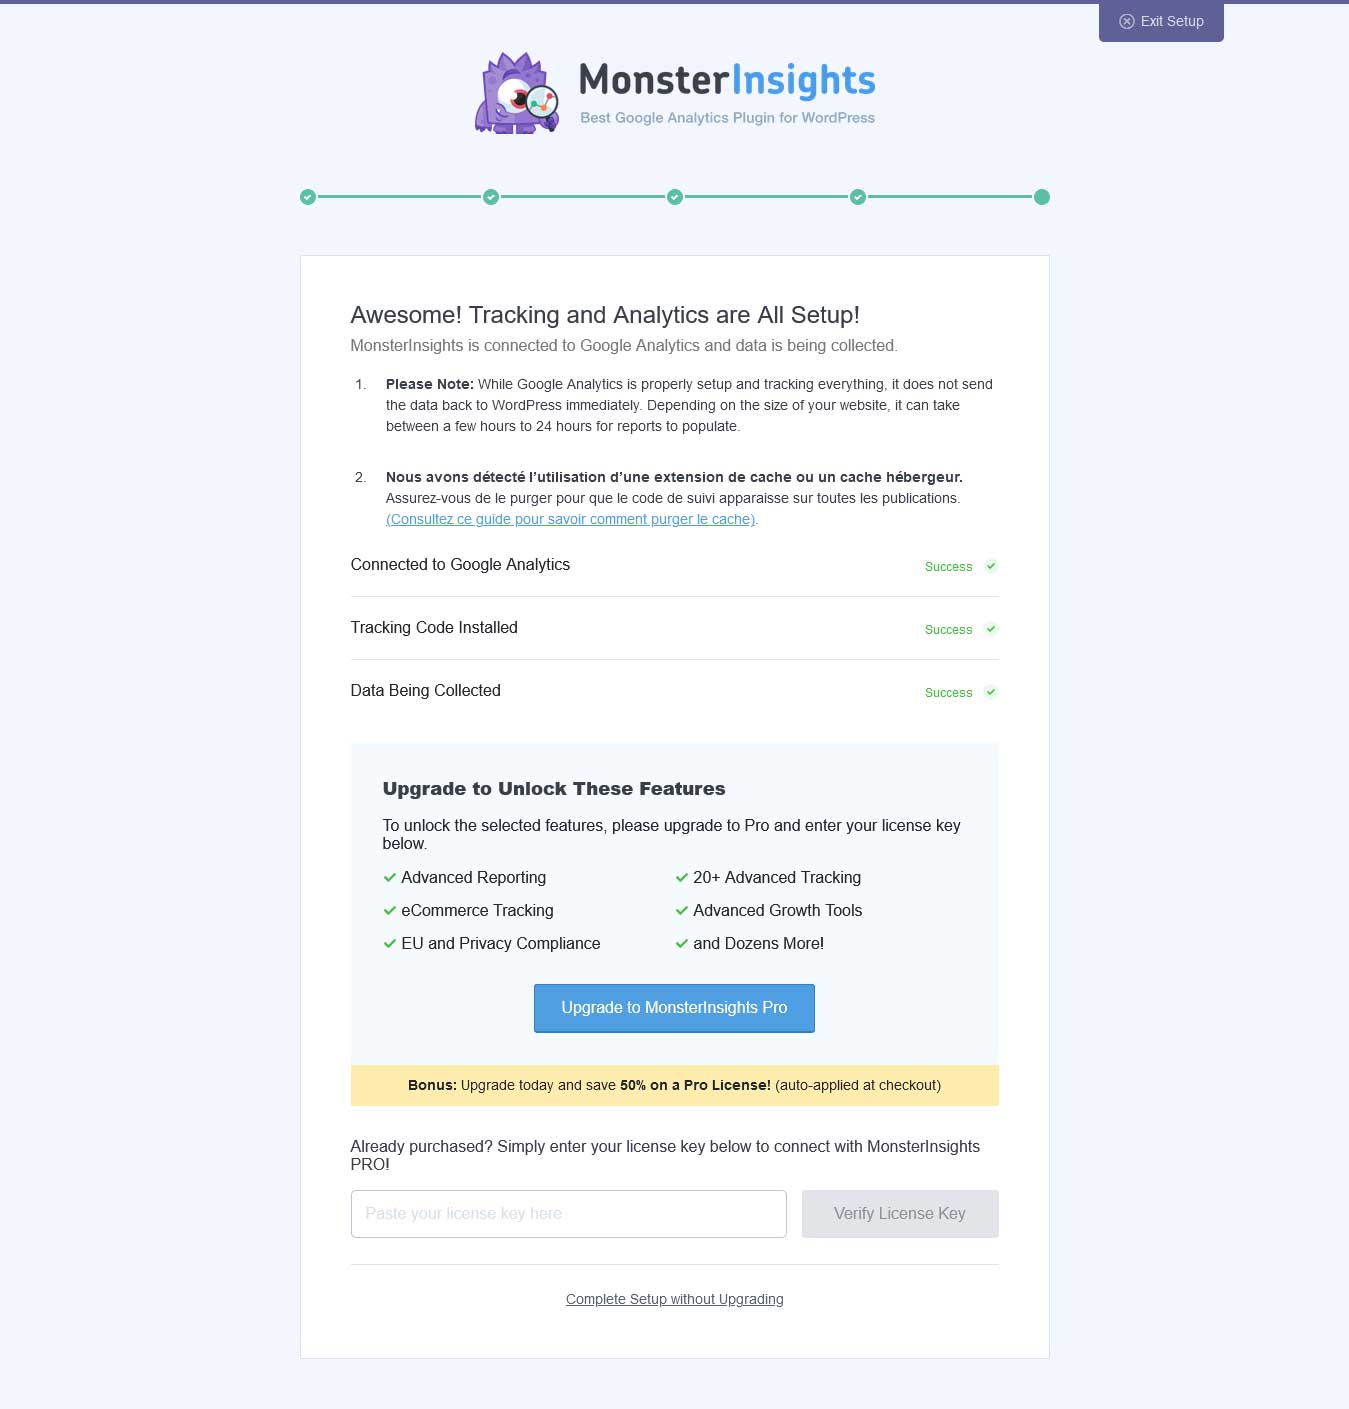
If everything went well, you will be notified that MonsterInsights and Google Analytics have been linked and also that your configuration has been taken into account.
To complete the process, click on the “Complete Setup without Upgrading” link below the page.
Now you can track from your WordPress management interface, all the analytics collected by Google Analytics.
Install Google Analytics on WordPress without plugin
If you have never touched the code, it is better to ignore this method and install Google Analytics on your site using a plugin.
Because here, the Google Analytics tracking code will be embedded in one of the WordPress source codes.
And if you are a professional and regularly touch code, it is prudent to make a backup of your site before following this method.
Make sure you have copied the Google Analytics tracking code as I showed you in the last step of creating a Google Analytics account.
Next, open the WordPress header.php file using a code editor, and paste the Google Analytics tracking code right after the body tag, save your file and then upload it to your server exactly where it was.
Other WordPress resources published on the blog
Beginner’s Guide: How to duplicate a page in WordPress or a post in WordPress?
Beginner’s Guide: How login WordPress admin, Modify it and Secure it
19 Best Hosting WordPress With Amazing Features
25 Best Free WordPress Business Themes
15 Best Portfolio WordPress Themes to Showcase Your Works and Projects
40+ best responsive themes (wordpress, woocommerce, shopify, prestashop, drupal)